Key takeaways
- Wall mounting fixes the bar's height and angle permanently, while shelf placement depends entirely on where the shelf happens to sit relative to your ears.
- Up firing Atmos drivers need a flat ceiling within about 2 to 3 metres to work well, and a shelf tucked under a cabinet overhang often blocks that path more than a wall mount does.
- A soundbar over 7 kg needs metal toggle anchors or a stud, not the plastic picture hooks that come with a generic bracket kit.
- Renters should default to shelf placement, since patching and repainting a wall mount hole typically costs $50 to $150 at move out.
- Check the manufacturer's clearance spec for rear vents, usually 5 to 8 cm, before bolting any bar flush to a wall.
A wall mounted bar sits at a fixed height and angle for as long as it stays on the wall. A shelf mounted bar depends entirely on the shelf: its height, its depth, and whatever gets stacked in front of it by accident.
I get called out for both setups more than almost any other soundbar question. A renter in a one bedroom flat wants the cables gone without touching a wall. A homeowner in a converted garage wants to know if drilling into fresh plaster is worth it for a bar that costs $300 to $600. Before you get to placement, make sure the bar itself is the right size, covered in how to choose a soundbar for your room.
Where the sound actually points
A soundbar mounted on the wall sits at whatever height you chose during install, and its front array points level at your ears from that spot every time. Move the sofa 60 cm closer and the angle barely changes.
A shelf mounted bar depends on the shelf. Put it on a console 25 cm below the screen and the drivers fire upward into your chin rather than your ears, which is why dialogue can sound thinner from a low shelf than the spec sheet suggests it should.
Up firing drivers make this worse on a shelf. They need a flat, unobstructed ceiling within about 2 to 3 metres (7 to 10 feet) to bounce sound down convincingly, and a shelf inside a media cabinet, or under an overhanging mantel, can rob you of most of that reflection. Wall mounting does not change your ceiling height, but it does at least clear the bar from under an overhang. Read how ceiling height changes what Atmos can actually do before you commit to either setup.
What a shelf does to your bass
A shelf is a physical object attached to a wall or a media unit, and it resonates. Thin shelving buzzes at certain bass frequencies, often somewhere in the 60 to 120 Hz range, which is exactly where a soundbar’s own driver or a paired subwoofer works hardest.
I have chased more rattling soundbar calls back to a shelf than to an actual product fault. A glass shelf over a TV console, loose screws in a flat pack unit, ornaments left in front of the grille: all of it buzzes before the soundbar itself has done anything wrong.
Wall mounting removes most of that. The bar bolts into a stud or a proper anchor, a stiffer and heavier mounting point than a shelf board. The trade off is that vibration can now transmit into the wall itself, which matters if you share a wall with a neighbour or a bedroom next door.
Before blaming the soundbar for a buzz, rest a hand flat on the shelf during a bass heavy scene. If the shelf moves more than the bar’s own casing does, the shelf is the problem.
Cable runs and how much wall work is involved
A shelf mounted bar usually sits within reach of the same power outlet and HDMI run already feeding the TV, so setup is normally a ten minute job with no tools beyond a screwdriver.
Wall mounting changes that. You need the HDMI cable, run to the TV’s eARC enabled input as explained in how eARC actually works between a TV and a bar, and a power cable to reach the bar’s new position, which is rarely where the old console cabling was designed to go.
Two options solve this: run cable neatly along wall trunking, a 30 to 60 minute job costing $15 to $40 in parts, or drop an in wall rated cable down inside the plasterboard, a half day job most people pay an installer $150 to $300 to do properly. In wall cable must be rated for that use. Ordinary HDMI cable inside a wall cavity is a fire code problem in most places, not just a cosmetic one.
The hardware wall mounting actually requires
Most soundbars ship with a pair of keyhole slots on the rear panel, not a universal mounting pattern, so check the manual for the exact bracket needed rather than assuming any generic TV mount will fit.
A compact 2.1 bar under 4 kg can often go straight onto two wall anchors rated for 5 kg each. A heavier unit, something in the Samsung HW-Q990D class at 7 to 9 kg, needs anchors rated well above the bar’s own weight, ideally into a stud rather than plasterboard alone.
Cheap plastic anchors sold for picture frames are not rated for a soundbar that gets bumped, knocked, or leaned on during cable changes. Use metal toggle anchors or hit a stud, and budget $10 to $20 for the right hardware if none came in the box.
Screen alignment and center channel height
Dialogue imaging depends on the center channel sitting close to ear height when you are seated, ideally within about 30 to 50 cm of where your ears actually sit on the sofa.
A wall mounted bar gets fixed at whatever height you chose, typically 5 to 10 cm below the bottom of the screen so it does not block the picture. Get that measurement wrong once and you either live with it or drill new holes.
A shelf mounted bar can usually slide forward, back, or move to a different shelf if the first height is wrong, which is the one real advantage a shelf holds over a wall bracket. For more on the relationship between bar height and screen size generally, soundbar size versus TV size, what matters is worth reading before you mount anything.
How easily you can change your mind
Renters move. Homeowners redecorate. A shelf mounted bar comes along with the console when the flat gets swapped for a bigger one, and leaves no marks behind at all.
A wall mounted bar leaves two or three holes, a bracket, and sometimes a cable channel that needs filling and repainting before a deposit gets returned. For a rental, that is real money: patching and painting a section of wall runs $50 to $150 if you are not doing the work yourself.
This is the criterion I weigh heaviest when a client is unsure. If there is any real chance the room changes within the next two years, shelf placement first. Wall mount only once you know the room is staying as it is.
Every difference in one table
| Criterion | Wall mounted | Shelf placed |
|---|---|---|
| Sound aim | Fixed and consistent once set | Depends on shelf height and depth |
| Bass and vibration | Can transmit into the wall | Shelf itself may resonate |
| Install effort | 1 to 4 hours, tools required | 10 to 20 minutes, no tools |
| Typical install cost | $50 DIY to $300 professional | $0 |
| Reversibility | Leaves holes and marks | Leaves nothing behind |
Matching the choice to the room you actually have
A small rental with a TV on a chest of drawers: shelf placement, every time. You get most of the sound quality with none of the deposit risk, and you can reposition the bar the day you notice the drivers firing into a cushion instead of your ears.
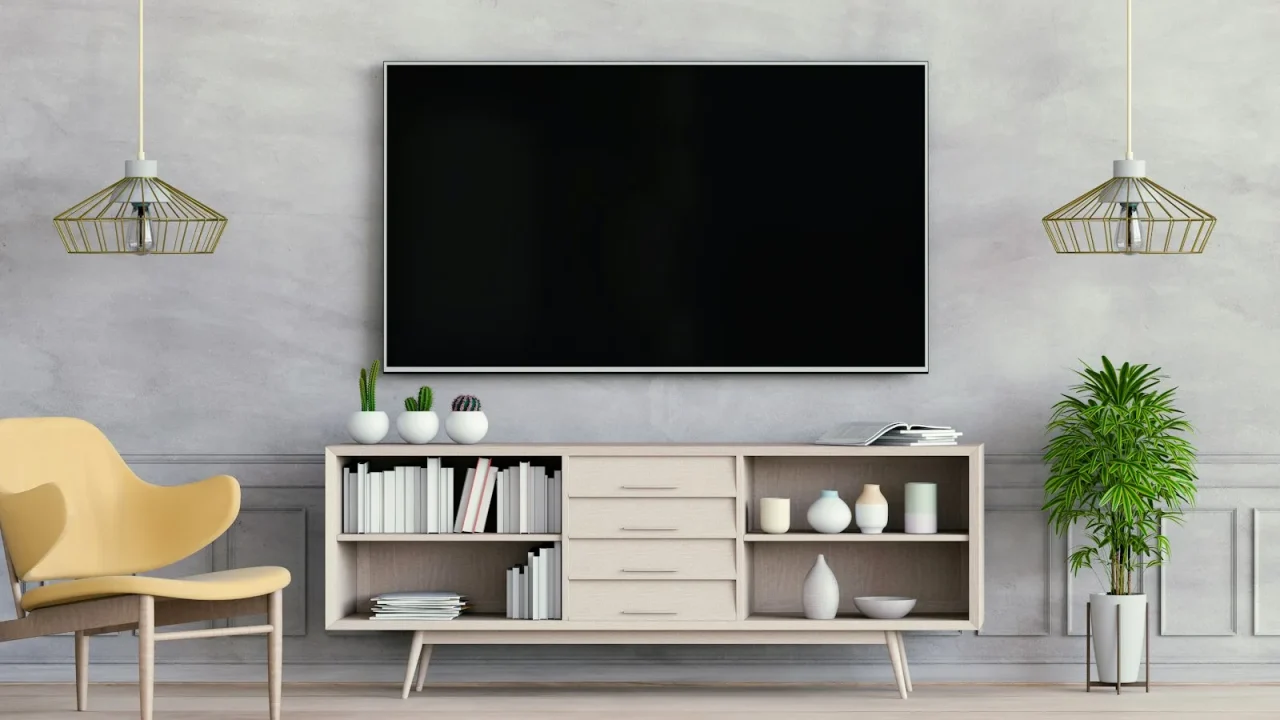
A living room you own, with a TV already wall mounted: mount the bar too. A soundbar sitting on a console below a wall mounted television looks unfinished and usually sits too low for good dialogue imaging, since the gap between screen and bar can grow to 40 or 50 cm.
An open plan room where the sofa position might change with the season: shelf again, at least for the first year. Learn where people actually sit before you commit a bracket to a wall.
A dedicated home cinema room with permanent seating and a bar like the Sonos Arc Ultra that you plan to keep for five years or more: wall mount it at the height the manufacturer’s manual specifies, and be done with the decision.
Check the manual for a minimum clearance behind the bar’s rear vents before wall mounting. Some models need 5 to 8 cm of airflow behind the cabinet or the amplifier runs hot under sustained bass.
A quick check before you mount anything
- Confirm the TV has an HDMI eARC port and measure the cable length the new position will need
- Measure clearance behind the bar for rear vents, usually 5 to 8 cm minimum
- Check ceiling flatness and height within 2 to 3 metres if the bar has up firing drivers
- Get a landlord’s written permission before drilling into a rented wall
- Test shelf resonance by hand before assuming the soundbar itself is at fault
Dolby’s own guidance on Atmos height channel reflection, at dolby.com, assumes a flat overhead ceiling within reach, which a shelf tucked under an overhang rarely offers. eARC’s extra bandwidth, defined in the HDMI 2.1 specification, is what makes a proper cable route worth the extra work in the first place.
Questions readers ask about this
Yes, if you use metal toggle or molly anchors rated for the bar's full weight plus a safety margin, typically double the bar's actual weight in kilograms. Plasterboard alone without a proper anchor will pull loose under vibration within weeks. For anything over 6 to 7 kg, hitting at least one stud is the safer choice.
Not automatically. It improves consistency, since the angle and height stay fixed once set correctly. If the shelf height was already close to ear level and the shelf itself does not resonate, a shelf mounted bar can sound just as good. Wall mounting buys control, not a guaranteed upgrade.
Most manufacturers recommend 5 to 10 cm below the screen's bottom edge, close enough that dialogue seems to come from the actors rather than a shelf below them. Check your specific model's manual, since a taller front baffle sometimes needs a little more clearance to avoid blocking the picture.
Generally no, provided you use the brand's own bracket or one it lists as compatible, and follow the stated weight rating. Using an aftermarket bracket not rated for that model, or drilling through the bar's own casing, is what typically voids coverage. Keep the bracket receipt with the soundbar's paperwork.
Yes. Unscrew the bracket, patch the two or three holes with filler, sand once dry, and touch up paint. The job takes under an hour for someone comfortable with basic DIY, or $50 to $100 if you hire it out. The soundbar itself needs no reconfiguration beyond re-running the HDMI and power cables.

About the author
Rahul Gupta
Rahul Gupta has spent nearly a decade quietly wiring living rooms, testing soundbars in every awkward apartment layout imaginable, and untangling the kind of HDMI handshake problems that make people give up on Atmos altogether. He writes here about what actually works when you get the boxes home—not what the spec sheet promises. If a piece of gear on this site earns a recommendation, it earned it in a real room with real furniture, not a lab.